

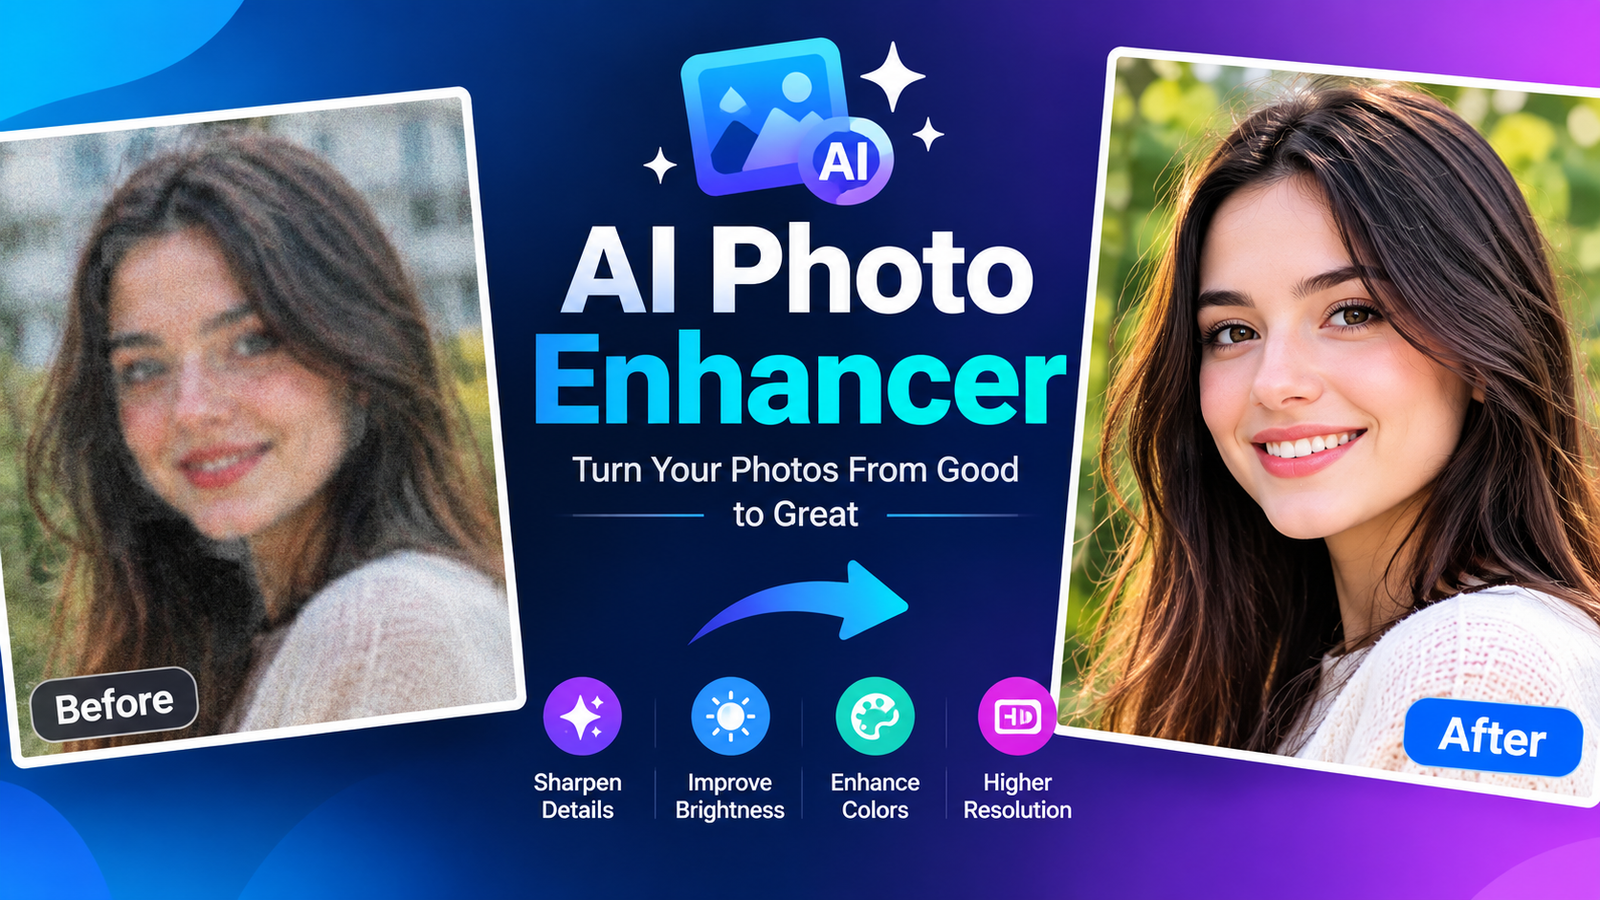
A blurry, dark, noisy, or low-resolution photo does not always need to be discarded. Modern AI tools can analyze an existing image and improve its sharpness, lighting, colors, facial details, and overall resolution in just a few clicks. That makes an ai photo enhancer useful for everything from old family pictures to social media content, product photography, and professional images.
Unlike traditional filters that apply the same adjustments across an entire image, AI enhancement can identify different elements and process them according to their visual characteristics. Depending on the tool, you may be able to remove noise, sharpen details, restore old photographs, enhance faces, or upscale an image for larger displays.
However, AI enhancement has limits. A tool cannot perfectly recover information that was never captured in the original photo. The best results come from choosing the right enhancement method and using a good-quality source image.
What Is an AI Photo Enhancer?
An AI photo enhancer is software that uses machine learning models to improve the visual quality of an existing photograph. Instead of creating a completely new image, it analyzes the pixels, identifies patterns, and applies changes designed to make the photo clearer and more visually appealing.
Common enhancement features include sharpening, denoising, color correction, exposure improvement, face enhancement, restoration, and image upscaling.
An AI photo enhancer blog may describe these features differently depending on the tool, but the underlying goal is usually the same: improve an existing image without requiring advanced photo-editing skills.
How Does AI Photo Enhancement Work?
The process typically starts by analyzing the image to identify edges, textures, faces, colors, noise, and other visual information. The AI model then estimates how those elements can be improved.
For example, if a portrait contains a slightly soft face, the software may enhance facial features while reducing unwanted noise. With an old photograph, it may attempt to restore contrast, remove scratches, and improve visible details.
The result is not necessarily a perfect reconstruction of the original scene. AI models sometimes generate plausible details, which is why enhanced images should always be checked carefully.
AI Photo Enhancer vs. AI Image Generator
These technologies have different purposes.
| Feature | AI Photo Enhancer | AI Image Generator |
| Starting point | Existing photo | Prompt or reference |
| Main purpose | Improve image quality | Create new imagery |
| Typical use | Sharpening, restoration, upscaling | Creative image generation |
| Original content | Usually preserved | Can be substantially changed |
| Best for | Fixing existing photos | Creating new visuals |
AI Photo Enhancer vs. Image Upscaler
An image upscaler primarily increases the dimensions of an image while attempting to reconstruct additional detail. An AI enhancer can do that too, but it may also improve exposure, color, noise, sharpness, faces, and other characteristics.
In simple terms, upscaling is about size and resolution, while enhancement is about overall image quality. Some modern tools combine both functions.
What Can an AI Photo Enhancer Fix?
The usefulness of AI depends heavily on the original image and the specific problem you are trying to solve.
Blurry Photos
AI can improve mildly blurry or soft images by increasing apparent edge definition and reconstructing details. This can help with portraits, smartphone photographs, scanned pictures, and product images.
Severe motion blur is more difficult. If important details are completely missing, enhancement may produce a sharper-looking result without actually restoring the original information.
Low-Resolution Images
A low-resolution photograph can often be enlarged with AI without looking as pixelated as a conventional resize. Depending on the software, users may choose 2x, 4x, or higher enlargement.
For example, a small product photograph intended for a website may become more suitable for a larger product page after AI upscaling.
Dark and Underexposed Photos
Some AI tools can brighten shadows, improve exposure, and balance colors. This can be particularly useful for indoor photographs or images captured in poor lighting.
However, excessive correction can create unnatural colors or reveal too much digital noise. Moderate adjustments generally produce more realistic results.
Noisy and Grainy Photos
Noise can appear when photographs are taken in low light or with high camera sensitivity. AI denoising attempts to remove unwanted grain while preserving useful texture.
The key is balance. Aggressive noise reduction can make skin, hair, fabric, and other surfaces appear unnaturally smooth.
Old or Damaged Photos
AI restoration can be useful for scanned family photographs and other historical images. Depending on the software, restoration may include scratch removal, contrast improvement, color restoration, sharpening, and face enhancement.
The original photograph should always be preserved separately because restoration can alter details.
Faces and Portraits
Face enhancement is one of the most noticeable AI applications. A suitable tool may improve facial clarity, eyes, hair, and other fine details.
Use this feature carefully. Strong facial reconstruction can sometimes create details that were not clearly present in the source image.
Product Photos
Ecommerce sellers can use AI enhancement to improve product edges, textures, colors, and overall clarity. A cleaner image can make a product listing look more polished without requiring a completely new photoshoot.
Best AI Photo Enhancers to Consider
There is no single tool that is ideal for every type of image. The right choice depends on your workflow, budget, platform, and the type of enhancement you need.
| Tool Type | Best For | Useful Features | Considerations |
| Online enhancer | Beginners | Quick uploads, automatic enhancement | May have usage limits |
| Desktop software | Photographers | Detailed controls, high-quality output | Usually requires installation |
| Mobile app | Social media users | Fast portrait and photo editing | Free versions may be restricted |
| Restoration tool | Old photographs | Repair, color and detail restoration | Results depend on source damage |
| Upscaling tool | Low-resolution images | 2x–8x enlargement | May reconstruct fine details |
| Professional AI editor | High-volume workflows | Batch processing and advanced controls | Higher cost or learning curve |
When comparing a best AI image enhancer free option, do not look only at whether the website says “free.” Check the actual download resolution, watermark policy, number of free credits, account requirements, and available enhancement features.
Free vs. Paid AI Photo Enhancers
A free AI photo enhancer can be enough when you only need occasional improvements. Free services often provide automatic enhancement without requiring technical knowledge.
However, free plans may impose restrictions such as limited daily credits, lower output resolution, watermarks, or fewer enhancement models.
Paid services can make more sense for photographers, designers, marketers, and businesses that process images regularly. Advanced features may include batch processing, higher-resolution exports, more control over enhancement settings, and faster processing.
Before paying, test a representative image. A tool that performs well on one type of photo may produce different results on portraits, product photography, or old scans.
How to Enhance a Photo With AI
Using an AI enhancer is usually straightforward.
Step 1: Start With the Best Original
Upload the highest-quality version available. Avoid repeatedly saving and compressing a JPEG before enhancement.
Step 2: Upload Your Photo
Most online tools provide a simple upload interface. Desktop applications may allow you to process several images at once.
Step 3: Select the Enhancement Mode
Choose the option that matches your problem. This could be sharpening, denoising, restoration, face enhancement, or upscaling.
Step 4: Choose the Output Resolution
If the tool offers multiple enlargement levels, do not automatically choose the highest setting. Excessive enlargement can introduce unnatural details.
Step 5: Compare the Preview
Compare the enhanced version with the original. Look closely at faces, hair, text, edges, and textures.
Step 6: Check for AI Artifacts
Watch for halos, strange facial features, artificial skin, repeated textures, or incorrectly reconstructed text.
Step 7: Download the Final Image
Keep the original file and save the enhanced version as a separate copy. This makes it easy to return to the source if you want to try another workflow.
How to Choose the Right AI Photo Enhancer
Start with the problem rather than the brand.
| Your Goal | Features to Look For |
| Fix a blurry photo | Deblur and sharpening |
| Restore an old photo | Restoration and scratch removal |
| Improve a portrait | Face enhancement |
| Fix a dark image | Exposure and noise reduction |
| Enlarge a small image | AI upscaling |
| Improve product images | Detail enhancement and batch processing |
| Protect sensitive images | Strong privacy controls or local processing |
Also check supported file formats, maximum output resolution, processing speed, batch capabilities, privacy terms, and pricing.
Someone searching for the best photo enhancer AI may have completely different requirements from a photographer processing hundreds of RAW files. Matching the tool to the workflow is more useful than choosing based on a generic feature list.
Practical AI Photo Enhancement Use Cases
Family and Old Photos
Scan an old photograph, clean up visible damage, improve contrast, and then upscale it for printing. Always keep the untouched scan as the archival original.
Social Media Photos
A smartphone image with mild noise can be enhanced before resizing it for a social platform. Moderate sharpening and color correction can make the final image appear cleaner without looking overprocessed.
Ecommerce Images
An online seller can enhance product edges and details before uploading photographs to an ecommerce store. This is particularly helpful when the original image is slightly soft.
Professional Photography
Photographers working with large numbers of images may benefit from batch enhancement, consistent processing, and specialized tools for noise reduction or RAW workflows.
Before-and-After AI Photo Enhancement
Before-and-after comparisons are one of the best ways to judge an AI tool.
For a meaningful test, use the same original image and record the enhancement settings. Compare the source and output at both normal viewing size and 100% zoom.
For example, with a low-light portrait, check whether the enhanced version has:
- Less visible noise
- Better facial clarity
- More balanced exposure
- Natural skin texture
- Accurate colors
With a low-resolution product image, inspect edges, labels, small text, and surface textures. An image can look impressive at thumbnail size but reveal AI artifacts when viewed closely.
For an E-E-A-T-focused review, document the original dimensions, output dimensions, tool used, settings, processing time, and visible changes. This provides readers with evidence rather than relying entirely on marketing claims.
What an AI Photo Enhancer Cannot Fix
AI enhancement is powerful, but it is not magic.
Extremely severe motion blur, tiny source images, heavy compression, missing facial features, and badly damaged photographs can remain problematic.
AI may also reconstruct details based on patterns it has learned. That means a result can look realistic while not being an exact representation of what was originally photographed.
This matters for important photographs, historical images, documents, and images containing small text. Always compare the enhanced version with the original before using it for an important purpose.
Common AI Photo Enhancement Mistakes
Over-Sharpening
Too much sharpening can create halos and harsh edges.
Excessive Face Enhancement
Strong facial processing may make skin look artificial or change subtle facial characteristics.
Upscaling Too Much
A huge output dimension does not guarantee genuine additional information.
Removing Too Much Noise
Aggressive denoising can remove useful texture along with unwanted grain.
Ignoring Color Accuracy
An image can appear more vibrant while becoming less realistic. Compare important colors against the source.
Judging Only at Thumbnail Size
Always inspect important details at 100% before finalizing the image.
Is AI Photo Enhancement Safe?
Privacy should be part of your tool-selection process, especially when working with personal or commercially sensitive photographs.
Before uploading an image, check whether the service stores files, how long images are retained, whether uploaded content may be used for model improvement, and whether users can delete their data.
For highly sensitive photographs, consider services that provide stronger privacy controls or local processing. Never assume that every online AI tool handles uploaded images in the same way.
Tips for Getting Better Results
You can often improve results by following a few simple practices:
- Use the highest-quality original available.
- Select enhancement settings according to the actual problem.
- Avoid repeated enhancement and compression.
- Do not automatically choose the maximum upscale.
- Compare the output with the original.
- Inspect faces, text, and fine textures closely.
- Preserve the original image separately.
- Use an appropriate output format and resolution.
- Test different settings when possible.
- Choose the least aggressive setting that achieves the desired improvement.
Conclusion
An ai photo enhancer can turn a soft, noisy, dark, damaged, or low-resolution photograph into a cleaner and more usable image without requiring advanced editing skills. The technology is particularly useful for portraits, old photographs, ecommerce images, social media content, and professional workflows.
The most important factor is not simply choosing the tool with the longest feature list. Start by identifying the problem with your image, select an appropriate enhancement method, compare the result with the original, and inspect fine details for AI artifacts.
When used carefully, AI enhancement can save time and improve image quality while keeping the editing process simple.
FAQs
What is an AI photo enhancer?
An AI photo enhancer is software that analyzes an existing photograph and uses machine learning to improve qualities such as sharpness, noise, lighting, color, facial detail, or resolution.
Can an AI photo enhancer fix blurry photos?
It can improve mild blur and softness, particularly when some original detail remains. Severe motion blur is much harder to correct because the missing information may not be recoverable.
Is there a free AI photo enhancer?
Yes, some services provide free enhancement features. However, free plans may restrict resolution, downloads, credits, processing speed, or available features. Always check the actual limits before relying on a free service.
Can AI make a low-resolution photo HD?
AI can upscale a low-resolution image and reconstruct plausible details, making it look cleaner at a larger size. However, it cannot guarantee that the reconstructed details are identical to information that existed in the original photograph.
Can AI restore old photos?
Yes. AI restoration tools can help improve faded, scratched, noisy, or low-resolution old photographs. Results depend on the condition and quality of the original image.
What is the difference between an AI enhancer and an upscaler?
An upscaler mainly increases image dimensions and attempts to reconstruct detail. An AI enhancer has a broader purpose and may also improve noise, sharpness, color, exposure, faces, and other visual characteristics.
Are online AI photo enhancers safe?
Safety depends on the specific service. Review its privacy policy and understand how uploaded images are stored, processed, and deleted before uploading personal or confidential photographs.
You May Also Read: Patrick Mahomes
